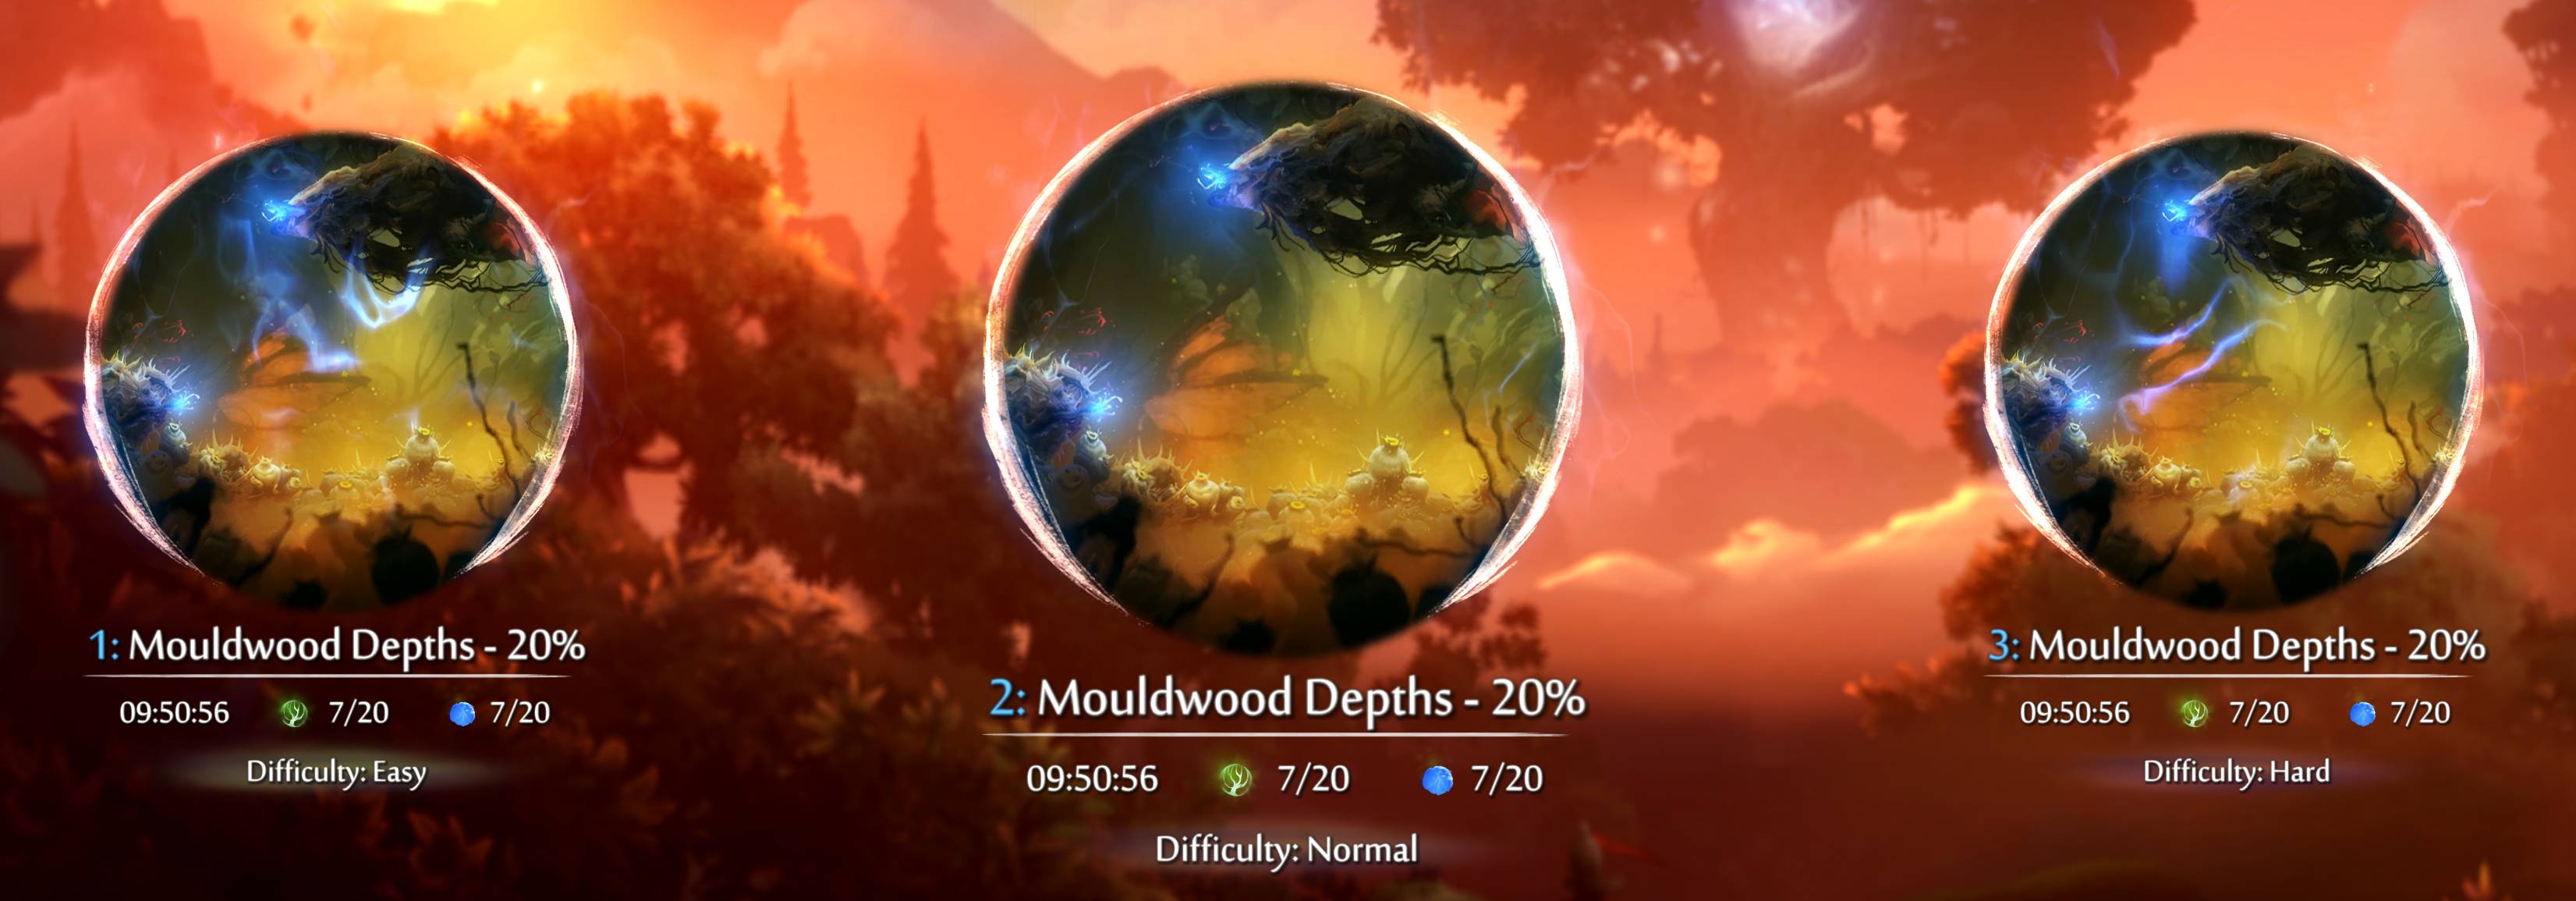
Ori and the Will of the Wisps is a platform-adventure video game. In this particular game, unlike the previous version, you cannot change the level of difficulty once you have started playing. The only way to adjust the difficulty is by starting the game again from the very beginning, which means you would lose all the progress you have made so far.
Having already spent a good 10 hours exploring the areas and fighting the different bosses, I found myself face to face with my nemesis, Mora, the giant spider. I came across multiple complaints online regarding this fight, and I even looked up guides on how to defeat this boss, but unfortunately, none of them were helpful. The only realistic way for me to proceed was to set the difficulty to easy.
Instead of starting the game all over again, I wanted to modify my existing save file - unfortunately, I couldn’t find any available editors online having this feature, therefore I decided to create my custom editor for modifying the difficulty.
Before starting the implementation, I’ve identified the following risks, which would mean that implementing the difficulty changer would be infeasible, and simply restarting the game would be a lot more efficient.
I began my analysis by starting a new game on all 3 difficulties. I collected the resulting save files from C:\Users\<user>\AppData\Local\Ori and the Will of The Wisps
, and then implemented a heuristic solution for finding the offset where the difficulty is stored.
I assumed that the difficulty must be an enum, which has consecutive numeric values, and this value increases as the difficulty increase, such as:
class Difficulty(enum.Enum):
Easy = 0
Medium = 1
Hard = 2
I implemented the following function, which takes the 3 save files that were previously collected, and compares them byte-by-byte. If there is an index such that the value in the easy file is exactly one less than the value in the medium file, which is exactly one less than the value in the hard file, we get an offset matching our assumption.
def get_possible_difficulty_offsets(
easy_bytes: bytes, medium_bytes: bytes, hard_bytes: bytes
) -> list[int]:
data = zip(easy_bytes, medium_bytes, hard_bytes)
return [
i
for i, (easy_byte, medium_byte, hard_byte) in enumerate(data)
if hard_byte - medium_byte == medium_byte - easy_byte == 1
]
The function returns three offsets: 0x145F
, 0x1463
and 0x279C
.
Save file difficulty | Value at 0x145F | Value at 0x1463 | Value at 0x279C |
---|---|---|---|
Easy | 0 | 0 | 0 |
Medium | 1 | 1 | 1 |
Hard | 2 | 2 | 2 |
By looking at the values, we can conclude that they all match the assumption, and they seem to be a good indicator of the difficulty to which the files belong.
The difficulty of a save file can be determined by obtaining the values at the previously determined offsets and comparing them to the difficulty enum, such as:
def maybe_get_difficulty(
save_bytes: bytes, offsets: list[int] | None = None
) -> Difficulty | None:
if offsets is None:
offsets = DEFAULT_DIFFICULTY_OFFSETS
values = [save_bytes[offset] for offset in offsets]
for difficulty in Difficulty:
if all(x == difficulty.game_value for x in values):
return difficulty
return None
Similarly, we can modify the byte values at the previously determined offsets:
def change_difficulty(
save_bytes: bytes, difficulty: Difficulty, offsets: list[int] | None = None
) -> bytes:
if offsets is None:
offsets = DEFAULT_DIFFICULTY_OFFSETS
save_bytes_array = bytearray(save_bytes)
for offset in offsets:
save_bytes_array[offset] = difficulty.game_value
return bytes(save_bytes_array)
I also created a CLI (it’s available on GitHub), which is capable of changing the difficulty in save files. The targeted platform is Windows, but it should work on all major operating systems.
> poetry run py main.py get-difficulty --path "C:\Users\<user>\AppData\Local\Ori and the Will of The Wisps\saveFile0.uberstate"
Difficulty: Medium
> poetry run py main.py set-difficulty --path "C:\Users\<user>\AppData\Local\Ori and the Will of The Wisps\saveFile0.uberstate" --difficulty easy
Is the current difficulty 'medium'? [y/N]: y
Is the desired difficulty 'easy'? [y/N]: y
Creating backup C:\Users\<user>\AppData\Local\Ori and the Will of The Wisps\saveFile0.uberstate.bak.1687803860
Patching file C:\Users\<user>\AppData\Local\Ori and the Will of The Wisps\saveFile0.uberstate
Done
> poetry run py main.py find-difficulty-offsets --easy-path "./tests/save_files/saveFile_easy.uberstate" --medium-path "./tests/save_files/saveFile_medium.uberstate" --hard-path "./tests/save_files/saveFile_hard.uberstate"
Found possible difficulty offset: 0x145F
Found possible difficulty offset: 0x1463
Found possible difficulty offset: 0x279C
Fishing in World of Warcraft is a secondary profession, which can be very lucrative but on the other hand, is very time-consuming and boring. It allows adventurers to fish various objects, primarily fish and other water-bound creatures, from water, lava, and even liquid mercury. (Wowpedia)
The mechanics of the minigame are really simple:
In this article, I’m assuming that the character has already learned the skill, has the proper equipment, and is facing a body of water.
To solve steps 4-8, I came up with the following flowchart:
The flow starts by casting the fishing spell, which can be achieved by sending a key press event to the main game window. In order to simplify things, we’ll assume that the cast is always successful for now.
In the next state, we need to observe the state of the appearing bobber by taking and analyzing screenshots.
If there is no catch in the screenshot, we take another one, otherwise, we calculate the bounding box of the bobber and send a mouse click event to the main game window.
Clicking the bobber will trigger the auto-loot mechanism which stores the fish in the bag automatically and another fishing spell can be cast.
There is always a possibility that something goes wrong (e.g another character obfuscates the view or the fishing spell cast fails). If there was no catch in the past 21 seconds, then the flow can be restarted by casting fishing again.
The implementation of the core logic with libraries such as pyautogui, is straightforward. However, identifying a catch is not that simple, and we need to have a function that takes a screenshot as the input and returns whether it contains a catch or not. For this task, I used YOLOv5 and followed their tutorial on training custom data.
I created two datasets with the principle that the same location (body of water) cannot appear in both of them. I manually annotated these images with LabelImg. The dataset contains images for both bobbers and splashes with different water colors, lighting conditions, and so on.
The configuration for the 2 classes are as follows:
path: data/fishnet
train: train
val: val
nc: 2
names: ["bobber", "splash"]
I started gathering training data while leveling fishing with my character in low-level zones. There are 140 screenshots in the dataset, some examples are:
The validation dataset contains screenshots of bobbers and splashes taken in the capitals. There are 24 screenshots in the dataset, some examples taken in Orgrimmar:
Example model outputs:
The resulting model is capable of identifying bounding boxes in real-time with good precision and recall, even with a very small train dataset.
The model would make it possible to implement an automated way of fishing in World of Warcraft, which I do not endorse or recommend, as it can lead to account suspension. Please use this article only for educational purposes.
]]>A year ago, I posted an article about the collection of railway traffic data in Hungary, and now it is time to develop a machine learning model and an application based on the gathered data.
The name of the solution is Mennyit Késik?, which translates to “How late it is?” in English. It is capable of predicting delays up to 60 minutes in advance for each suburban train and the predictions are displayed in an interactive map.
The solution consists of the following main building blocks:
The first step is a collection of lambda functions integrated with multiple data sources. These functions run on a fixed-size VPS, as it does not need to scale. The details of the data collection can be found in a previous article.
On the same VPS there is a MinIO instance running, which is an S3 compatible object storage. The collected data are stored in a MinIO bucket, and they are aggregated and compressed daily using a lambda function to save space.
To create a maintainable data pipeline, I started the project with QuantumBlack Labs’ kedro framework. Kedro is an open-source Python framework for creating reproducible, maintainable, and modular data science code. It borrows concepts from software engineering and applies them to machine-learning code.
The pipeline starts by preprocessing the data available in the MinIO bucket, then proceeds to cleaning, feature extraction, and model input generation.
For each train, a distinct LightGBM model is trained. The input of the model consists of both auxiliary and time-series features. The hyperparameter optimization uses the hyperopt library, and the calculated hyperparameters are stored in a MinIO bucket, which can be reused for subsequent pipeline runs. By using the calculated hyperparameters, the models are trained with all available data and are stored in a MinIO bucket.
The trained models are executed each time new data becomes available and the results are stored in a MongoDB database.
The backend of the solution is a NestJS application running on Heroku, and its main purpose is to serve the predictions to the frontend as they are found in the MongoDB database. It is completely independent from the core application logic, and it can be scaled as the number of users increase.
The frontend of the solution is a simple Next.js application consisting of a map, which visualizes the predictions for the end-users.
]]>One of the most frequently encountered issues for new Signal users are the delayed notifications. There is an official article for troubleshooting notifications and Signal is also actively collecting user feedbacks with which they can find the root cause of the problem for the different devices. Unfortunately, custom ROMs are out of scope and the effort is restricted to stock Android ROMs.
When I installed LineageOS 18.1 for the first time, I realized that Signal notifications are only received when the screen is turned on. I turned off battery optimizations and background restrictions for the application, but the problem still persisted.
After checking the logs it turned out that the problem is related to Android’s Doze. Even though the background restrictions were disabled for the application, it was not whitelisted for Doze.
You can check the whitelist on your device by executing the following command:
adb shell dumpsys deviceidle whitelist
If you cannot see org.thoughtcrime.securesms
on the whitelist, odds are you can fix the notifications by following the solution below.
You can add Signal to the whitelist by executing the following command:
adb shell dumpsys deviceidle whitelist +org.thoughtcrime.securesms
This command will disable Doze for Signal, and the notifications should appear immediately regardless of the state of your screen.
]]>In 2019, way before the success of The Queen’s Gambit, a wild idea appeared. Everybody was playing battle royale games at that time, and I’ve been mostly playing chess, so what if we combined these two genres together? I talked about the idea with my colleagues, and they also found it interesting. A prototype was made, the mechanics turned out to be enjoyable, therefore I teamed up with András Móczi to create an MVP for a public release and see what others think about the game. Unfortunately, the initial enthusiasm faded away when COVID-19 hit, but observing the most recent hype around chess, it was not even a question that we should finish the project. Here are the results:
In Chess.BR you can play the classic chess game with a modern twist. Using the popular battle royale game mechanics, you are set against a computer opponent on a constantly shrinking play area.
◾ Know Queen’s Gambit by heart? Change the difficulty of the gameplay if you love to have a hard time.
◽ The app lets you choose the way how you lose - play with Black or White pieces and set the game timer to your preference.
◾ Do not get too comfortable with your progress in game. Every few turns the chess board will get smaller and smaller… any pieces you lose the shrinking play area are lost forever, much like your chance to win afterwards.
◽ Did we mention that the game is hard?
The main motivation of the project was to improve ourselves besides our everyday duties. András (as a designer) wanted to learn more about Android development by using Android Studio, and I (as a traditional software developer) wanted to involve myself with AI.
In order to meet both of our goals, we’ve decided to create an Android application for the MVP, and to think about the cross-platform requirements later on should the release be successful.
The project is based on Jeroen Carolus’s android-chess application, which contains a MIT-licensed chess engine written in C++. This engine was extended with the business logic required for the battle royale game mode and we also created an application from scratch with custom made design.
]]>The two most popular companion applications for the Mi Smart Band 5 are Mi Fit and Zepp. Both applications support the tracking of different kinds of workouts, however they do not allow the user to export the collected data for further analysis. Due to the General Data Protection Regulation (GDPR) users may download their personal data from both applications, but the resulting archive does not contain workout specific data. The Zepp application also allows the user to export workouts one-by-one in .gpx format, but it does not contain all the available data and it is infeasible to export thousands of workouts manually.
Both applications synchronize the workouts to the cloud, which should make it easy to investigate the HTTP requests and responses. My favorite web debugging proxy tool is Telerik’s Fiddler which is able to decrypt HTTPS traffic originating from mobile devices. There is also a good tutorial available which explains how to set up your devices.
The endpoints of the API require a user context for which an authorization token is needed. There are at least two ways to extract the token, for which you will need to log in to the application first.
If you have root access on your Android device, you can find the token at /data/data/com.xiaomi.hm.health/shared_prefs/hm_id_sdk_android.xml
(Mi Fit) or /data/data/com.huami.watch.hmwatchmanager/shared_prefs/hm_id_sdk_android.xml
(Zepp). These files can be accessed via a file manager, or via ADB shell (Android 11+).
If you do not have root access, you can use Fiddler or HTTP Toolkit to analyze the requests sent by the application, which contain the exact same apptoken
header, which is required by the endpoints discussed below.
By analyzing the traffic of the application, it turned out the following endpoint returns the metadata of all workouts:
https://api-mifit-de2.huami.com/v1/sport/run/history.json
It requires the following header:
Key | Example value |
---|---|
apptoken | DQVBQE…WHtrY |
And the following GET parameter:
Key | Example value |
---|---|
source | “run.mifit.huami.com” |
In Python:
def get_history():
r = requests.get('https://api-mifit-de2.huami.com/v1/sport/run/history.json', headers={
'apptoken': token
}, params={
'source': 'run.mifit.huami.com',
})
r.raise_for_status()
return r.json()
The response is a list of metadata corresponding to the workouts that were recorded in the requested interval. The format of a workout metadata is as follows (the values were redacted):
{
"code": 1,
"message": "success",
"data": {
"summary": [
{
"trackid": "1234567890",
"source": "run.mifit.huami.com",
"dis": "0.0",
"calorie": "0.0",
"end_time": "0",
"run_time": "0",
"avg_pace": "0.0",
"avg_frequency": "0.0",
"avg_heart_rate": "0.0",
"type": 0,
"location": "",
"city": "",
"forefoot_ratio": "",
"bind_device": "",
"max_pace": 0,
"min_pace": 0,
"version": 0,
"altitude_ascend": 0,
"altitude_descend": 0,
"total_step": 0,
"avg_stride_length": 0,
"max_frequency": 0,
"max_altitude": 0,
"min_altitude": 0,
"lap_distance": 0,
"sync_to": "",
"distance_ascend": 0,
"max_cadence": 0,
"avg_cadence": 0,
"landing_time": 0,
"flight_ratio": 0,
"climb_dis_descend": 0,
"climb_dis_ascend_time": 0,
"climb_dis_descend_time": 0,
"child_list": "",
"parent_trackid": 0,
"max_heart_rate": 0,
"min_heart_rate": 0,
"swolf": 0,
"total_strokes": 0,
"total_trips": 0,
"avg_stroke_speed": 0,
"max_stroke_speed": 0,
"avg_distance_per_stroke": 0,
"swim_pool_length": 0,
"te": 0,
"swim_style": 0,
"unit": 0,
"add_info": "",
"sport_mode": 0,
"downhill_num": 0,
"downhill_max_altitude_desend": 0
}
]
}
}
For each workout metadata the corresponding detail can be queried by using the following endpoint:
https://api-mifit-de2.huami.com/v1/sport/run/detail.json
It also requires the apptoken
header and the above-mentioned GET parameter with an additional identifier:
Key | Example value |
---|---|
trackid | 123456789 |
In Python:
def get_detail(track_id, source):
r = requests.get('https://api-mifit-de2.huami.com/v1/sport/run/detail.json', headers={
'apptoken': token
}, params={
'trackid': track_id,
'source': source,
})
r.raise_for_status()
return r.json()
The response contains the detail of the requested workout, including the location information. The format of a detailed workout is as follows (the values were redacted):
{
"code": 1,
"message": "success",
"data": {
"trackid": 1234567890,
"source": "run.mifit.huami.com",
"longitude_latitude": "0,0;...",
"altitude": "0;...",
"accuracy": "0;...",
"time": "0;...",
"gait": "0,0,0,0;...",
"pace": "0.0;...",
"pause": "",
"spo2": "",
"flag": "0;...",
"kilo_pace": "",
"mile_pace": "",
"heart_rate": "0,0;...",
"version": 0,
"provider": "",
"speed": "0,0.0;...",
"bearing": "",
"distance": "0,0;...",
"lap": "",
"air_pressure_altitude": "",
"course": "",
"correct_altitude": "",
"stroke_speed": "",
"cadence": "",
"daily_performance_info": "",
"rope_skipping_frequency": "",
"weather_info": "",
"coaching_segment": ""
}
}
An example Python implementation can be found on GitHub.
]]>Hungarian State Railways released their Android application back in 2018, which is a convenient alternative to Elvira for browsing the schedule and buying tickets. In 2019, the application was revamped which introduced a mysterious error for some users (including myself) that would always interrupt the payment process without any straight-forward reason. In the meantime, I reverted to using Elvira instead of the application while hoping for the arrival of an official fix.
A few days ago I tried to buy a ticket on Elvira, but the system would not let me log in anymore due to “having” invalid characters in my perfectly valid email address.
Invalid input!
Don't use following charachters in the input fields: [()]'<>%"
After this unfortunate experience, I decided it was time to move on and find out why the application is not working.
According to my personal experience and the reviews posted on Google Play, the error appears when the user is redirected from the application to the payment processor’s website.
The error is kind of weird, because apparently the payment processor’s page is rendered correctly in the background and the only thing that prevents the user from using it is the appearing dialog which ultimately interrupts the payment process upon clicking the OK button.
First, I downloaded the APK file of the application and extracted it using apktool.
PS X:\MAV> apktool d hu.mavszk.vonatinfo_2020-08-31.apk
I: Using Apktool 2.4.1 on hu.mavszk.vonatinfo_2020-08-31.apk
I: Loading resource table...
I: Decoding AndroidManifest.xml with resources...
I: Loading resource table from file: X:\apktool\framework\1.apk
I: Regular manifest package...
I: Decoding file-resources...
I: Decoding values */* XMLs...
I: Baksmaling classes.dex...
I: Copying assets and libs...
I: Copying unknown files...
I: Copying original files...
After the extraction of the application files I ran a quick search for the string simplepay and determined which .smali files implement the functionality. Due to copyright reasons I am not going to include the decompiled code here, but if you are interested, you can easily find the error handler function of the WebViewClient in the .smali files.
Next, I replaced the body of the error handler function with some simple logging:
public void onReceivedError(WebView view, WebResourceRequest request, WebResourceError error) {
Log.i("MAV", view.getUrl());
Log.i("MAV", request.getMethod());
Log.i("MAV", request.getUrl().toString());
Log.i("MAV", String.valueOf(error.getErrorCode()));
Log.i("MAV", error.getDescription().toString());
}
# virtual methods
.method public onReceivedError(Landroid/webkit/WebView;Landroid/webkit/WebResourceRequest;Landroid/webkit/WebResourceError;)V
.locals 2
.param p1, "view" # Landroid/webkit/WebView;
.param p2, "request" # Landroid/webkit/WebResourceRequest;
.param p3, "error" # Landroid/webkit/WebResourceError;
.line 10
const-string v0, "MAV"
invoke-virtual {p1}, Landroid/webkit/WebView;->getUrl()Ljava/lang/String;
move-result-object v1
invoke-static {v0, v1}, Landroid/util/Log;->i(Ljava/lang/String;Ljava/lang/String;)I
.line 11
const-string v0, "MAV"
invoke-interface {p2}, Landroid/webkit/WebResourceRequest;->getMethod()Ljava/lang/String;
move-result-object v1
invoke-static {v0, v1}, Landroid/util/Log;->i(Ljava/lang/String;Ljava/lang/String;)I
.line 12
const-string v0, "MAV"
invoke-interface {p2}, Landroid/webkit/WebResourceRequest;->getUrl()Landroid/net/Uri;
move-result-object v1
invoke-virtual {v1}, Landroid/net/Uri;->toString()Ljava/lang/String;
move-result-object v1
invoke-static {v0, v1}, Landroid/util/Log;->i(Ljava/lang/String;Ljava/lang/String;)I
.line 13
const-string v0, "MAV"
invoke-virtual {p3}, Landroid/webkit/WebResourceError;->getErrorCode()I
move-result v1
invoke-static {v1}, Ljava/lang/String;->valueOf(I)Ljava/lang/String;
move-result-object v1
invoke-static {v0, v1}, Landroid/util/Log;->i(Ljava/lang/String;Ljava/lang/String;)I
.line 14
const-string v0, "MAV"
invoke-virtual {p3}, Landroid/webkit/WebResourceError;->getDescription()Ljava/lang/CharSequence;
move-result-object v1
invoke-interface {v1}, Ljava/lang/CharSequence;->toString()Ljava/lang/String;
move-result-object v1
invoke-static {v0, v1}, Landroid/util/Log;->i(Ljava/lang/String;Ljava/lang/String;)I
.line 15
return-void
.end method
To my surprise, I successfully managed to buy a ticket just by replacing the error function with some simple logging, but the root cause of the problem was still unknown.
The output of Logcat clearly shows that the problem is related to the loading of the Google Analytics library.
12755 I MAV: https://securepay.simplepay.hu/pay/pay/pspHU/[redacted]
12755 I MAV: GET
12755 I MAV: https://www.google-analytics.com/analytics.js
12755 I MAV: -6
12755 I MAV: net::ERR_CONNECTION_REFUSED
The connection refused error is most likely caused by an adblocker present either on the device or on the network.
But why does the unavailability of the Google Analytics library prevents the placement of a new ticket order? I think a plausible explanation is the deprecation of the old error handler at API level 23.
The documentation of the old (< API level 23) WebViewClient error handler claims that the function is only called for unrecoverable errors:
public void onReceivedError (WebView view, int errorCode, String description, String failingUrl)
Report an error to the host application. These errors are unrecoverable (i.e. the main resource is unavailable). The errorCode parameter corresponds to one of the ERROR_* constants.
However, according to the documentation of the new (≥ API level 23) WebViewClient error handler, it behaves differently as it is called for every single resource on the website:
public void onReceivedError (WebView view, WebResourceRequest request, WebResourceError error)
Report web resource loading error to the host application. These errors usually indicate inability to connect to the server. Note that unlike the deprecated version of the callback, the new version will be called for any resource (iframe, image, etc.), not just for the main page. Thus, it is recommended to perform minimum required work in this callback.
I suspect that the upgrade of the error handler function from the deprecated version to the newer one was made without taking a proper look at the documentation, which introduced this error for numerous users. I would consider this to be a serious problem as it effectively prevents some users from purchasing tickets via the application, which inherently reduces the revenue.
As a quick workaround, I wrapped the body of the original error handler function in a condition which prevents the cancellation of the payment process when the error equals to net::ERR_CONNECTION_REFUSED.
.method public final onReceivedError(Landroid/webkit/WebView;Landroid/webkit/WebResourceRequest;Landroid/webkit/WebResourceError;)V
.locals 3
invoke-virtual {p3}, Landroid/webkit/WebResourceError;->getErrorCode()I
move-result v2
const/4 v1, -0x6
if-eq v2, v1, :connection_error
[redacted original code]
goto :return
:connection_error
nop
:return
return-void
.end method
I created a CI pipeline on GitLab which automatically downloads the latest APK and patches it. The pipeline runs periodically and produces an up-to-date APK which can be installed on devices. Due to copyright reasons, I am not going to publish the patched APK but you should be able to reproduce the results by following the ideas presented in this article.
]]>Traffic itself can be a huge challenge for most commuters regardless of the transportation method of their choice. For example, it is inevitable to experience delays and congestion during rush hours. All commute methods have their own specific characteristics when it comes to delays - cars and buses suffer from traffic jams and similar principles apply to railways as well. However, the causes of railway delays are not that straightforward, and they need further investigation. According to my personal experience most passengers are not aware of the reasons behind train delays even though they are usually encountered multiple times a day. In order to have a clearer understanding, I have started to collect data from various sources at the beginning of 2019.
I found that the most reliable publicly available data source for traffic is the official map of Hungarian State Railways, where all trains can be tracked in real-time. The official map uses Google Maps to display the currently traveling trains. The trains are color-coded depending on their delays - green means the delay is less than or equal to 5 minutes, yellow means the delay is between 6-14 minutes, orange means the delay is between 15-59 minutes and red means the delay is above 1 hour.
A snapshot of the map contains the following information about each of the trains that were active at the time the snapshot was taken in JSON format:
Field name | Example value | Note |
---|---|---|
@CreationTime | “2020.06.25 17:41:05” | Timestamp of the snapshot |
@ElviraID | “5740486_200625” | Daily unique ID of a given train |
@Menetvonal | “MAV” | Operator of a given train |
@Line | “100” | Current railway line of a given train |
@TrainNumber | “552761” | Unique ID of a given train |
@Relation | “Monor - Budapest-Nyugati” | Terminals of a given train |
@Lat | 47.48300 | Current latitude of a given train |
@Lon | 19.12723 | Current longitude of a given train |
@Delay | 1 | Current delay of a given train |
In addition to the traffic data I also collected the corresponding weather data for every train, because I suspect that weather has an influence on the delays as well. It was not easy to find a free provider which is capable of handling the necessary amount of requests, but after many trials I decided to use OpenWeatherMap. Its free tier gives access to 60 location-based weather requests per minute, which is still not enough for every individual train, but can be sufficient to place virtual weather stations all over Hungary with a resolution of approximately 35.5 km.
Virtual weather station. A virtual weather station is a GPS position which can be queried for up-to-date local weather information.
The first task is to distribute the available 60 slots uniformly such that every train can be assigned to the closest virtual weather station. Finding an exact solution to the problem would have been infeasible, therefore I decided to develop an approximation algorithm for which I used the GeoNames geographical database which contains POIs in Hungary and is available for download free of charge under the Creative Commons Attribution 4.0 license. The algorithm is based on a k-d tree which allows fast nearest neighbor searches for POIs. It results in an approximately uniform placement of virtual weather stations, and they are located at densely populated areas where accurate weather information benefits more people.
Upon taking a traffic snapshot the closest virtual weather station is determined for each train and its most recent observation is assigned to the train which consists of the following:
Field name | Example value |
---|---|
Weather | “Clouds” |
Temperature | 26.28 °C |
Pressure | 1020 hPa |
Cloudiness | 98% |
Humidity | 44% |
Wind | 1.5 m/s |
Visibility | 10000 m |
Rain | 0 mm |
Snow | 0 mm |
The official delay-related news are published on the RSS feed of MÁVINFORM, which can be processed using Natural Language Processing methods.
I am using the following system for the data collection which basically operates free of charge:
The scheduler at cron-job.org invokes a script on Heroku every minute which prepares an extended snapshot based on the real-time map, the most recent weather observations and the MÁVINFORM news. The snapshot is then uploaded to an S3-compatible storage in JSON format:
{
"metadata": {
"version": 3,
"date": "2020-09-03T18:50:07.896Z"
},
"entries": [
{
"train": {
"trainId": "552741",
"elviraId": "5649157_200903",
"operator": "MAV",
"relation": "Monor - Budapest-Nyugati",
"line": "100",
"location": {
"type": "Point",
"coordinates": [
19.29098,
47.3969
]
},
"delay": 1
},
"weather": {
"weatherType": 800,
"temperature": 17.05,
"pressure": 1022,
"humidity": 0.63,
"cloudiness": null,
"windSpeed": 3.6,
"visibility": 10000,
"rain": null,
"snow": null
}
},
...
],
"posts": {
"mavinform": [
{
"postId": 75931,
"title": "Késések az észak-balatoni vonalon",
"date": "2020. szeptember 3. csütörtök, 17.32",
"content": "Csütörtök délután a fővárosba tartó KÉK HULLÁM sebesvonat (19703-as vonat) Fövenyes megállóhelytől 60-70 perces késéssel közlekedik tovább, mert egy utas a mozgó vonatról leszállva balesetet szenvedett. A Tapolcára tartó KÉK HULLÁM sebesvonat (19786-os vonat) Aszófőn várakozásra kényszerült, várhatóan 40-50 perces késéssel indulhat tovább.",
"lastUpdate": "2020-09-03T15:32:48.000Z"
},
...
]
}
}
As of June 2020, the dataset consists of 700,000 snapshots containing over 135 million train records. In the next article I am going to evaluate the dataset and provide possible answers for the delay problem.
]]>The heap corruption is gone, but the game is still unusable because the UI was not designed using responsive technologies and it appears broken using today’s common aspect ratios. Logical Stones lacks resolution handling - it goes full screen and uses the current resolution of your display, which just looks weird at the widespread 1920x1080 resolution:
First, I looked for the location in the code where the main game window is created:
{
[...]
WndClass.style = 32;
WndClass.lpfnWndProc = sub_41599C;
WndClass.cbClsExtra = 0;
WndClass.cbWndExtra = 0;
WndClass.hInstance = hInstance;
WndClass.hIcon = LoadIconA(0, (LPCSTR)0x7F00);
WndClass.hCursor = LoadCursorA(0, (LPCSTR)0x7F00);
WndClass.hbrBackground = (HBRUSH)GetStockObject(4);
WndClass.lpszMenuName = 0;
WndClass.lpszClassName = "LGStones";
RegisterClassA(&WndClass);
dword_44797C = GetSystemMetrics(0);
dword_447980 = GetSystemMetrics(1);
v4 = CreateWindowExA(
0,
"LgStones",
"Logical Stones Game",
0x90880000,
0,
0,
dword_44797C,
dword_447980,
0,
0,
hInstance,
0);
[...]
}
As you can see dword_44797C
and dword_447980
are the global variables which contain the width and height of your current display obtained by calling GetSystemMetrics
with parameters SM_CXSCREEN
and SM_CYSCREEN
respectively.
In order to fix the resolution of the game, we need to take care of the above-mentioned variables and constants.
Instead of setting the values of dword_44797C
and dword_447980
based on the values reported by GetSystemMetrics
a custom value can be used by patching the game binary. I used OllyDbg to apply the changes.
[...]
PUSH 0
CALL <JMP.&USER32.GetSystemMetrics>
MOV DWORD PTR DS:[44797C],EAX
PUSH 1
CALL <JMP.&USER32.GetSystemMetrics>
MOV DWORD PTR DS:[447980],EAX
ADD ESP,-4
PUSH 0
PUSH EBX
PUSH 0
PUSH 0
PUSH EAX
PUSH DWORD PTR DS:[44797C]
PUSH 0
PUSH 0
PUSH 90880000
PUSH LgStones.00415843 ; ASCII "Logical Stones Game"
PUSH LgStones.00415857 ; ASCII "LgStones"
PUSH 0
CALL <JMP.&USER32.CreateWindowExA>
[...]
The CreateWindowExA
function expects the width of the window to be located at 0x0044797C
and the height of the window to be in the EAX
register.
The task is to initialize dword_44797C
, dword_447980
and EAX
with hard coded constant values which can be easily modified later. The default resolution is going to be 1024x768 which used to be a very common resolution with 4:3 aspect ratio back then.
The hexadecimal value of 1024 is moved to EAX
then copied to dword_44797C
. The same applies to the height - the hexadecimal value of 768 is moved to EAX
then copied to dword_447980
. Now the global variables are initialized and EAX
contains the height of the window as it is expected by CreateWindowExA
.
MOV EAX,400
MOV DWORD PTR DS:[44797C],EAX
MOV EAX,300
MOV DWORD PTR DS:[447980],EAX
NOP
NOP
NOP
NOP
ADD ESP,-4
PUSH 0
PUSH EBX
PUSH 0
PUSH 0
PUSH EAX
PUSH DWORD PTR DS:[44797C]
PUSH 0
PUSH 0
PUSH 90880000
PUSH LgStones.00415843 ; ASCII "Logical Stones Game"
PUSH LgStones.00415857 ; ASCII "LgStones"
PUSH 0
CALL <JMP.&USER32.CreateWindowExA>
I have created a small utility which can directly overwrite our hard-coded 1024x768 resolution. When you start the tool you will be asked about the desired width of the game window. The height is automatically calculated to match the 4:3 aspect ratio required by the UI.
#include <iostream>
#include <fstream>
#include <string>
static const size_t WINDOW_WIDTH_OFFSET = 0x00014CC7;
static const size_t WINDOW_HEIGHT_OFFSET = 0x00014CD1;
template <typename T>
void patch(std::ofstream& executable, size_t offset, const T& value)
{
executable.seekp(offset, std::ofstream::beg);
executable.write(reinterpret_cast<const char*>(&value), sizeof(T));
executable.flush();
}
int main() {
std::ofstream executable("LgStones.exe", std::ofstream::in | std::ofstream::out | std::ofstream::binary);
if (executable) {
std::cout << "Width of the game window: ";
std::string width_str;
std::getline(std::cin, width_str);
uint32_t width = std::stoi(width_str);
uint32_t height = uint32_t(width / 4.0f * 3.0f);
std::cout << "Height of the game window: " << height << std::endl;
patch<uint32_t>(executable, WINDOW_WIDTH_OFFSET, width);
patch<uint32_t>(executable, WINDOW_HEIGHT_OFFSET, height);
std::cout << "Done!" << std::endl;
}
else {
std::cerr << "Couldn't find LgStones.exe!" << std::endl;
}
system("pause");
return 0;
}
You may download and play the game, including all the fixes for free.
The source code for LgStonesAllocator
and LgStonesResolutionChanger
are also available.
Are you stuck on a planet? Let me know in the comments!
]]>Logical Stones is a freeware puzzle game made by Tibor Neszt and his team back in 2006. The game is similar to Sokoban in many ways, but with a twist, it utilizes gravity and some additional rules. The goal of the game is to push all the stones to the exit points as fast as you can.
Logical Stones used to work just fine in Windows 98 and Windows XP. However, it crashes upon startup in newer versions of Windows even if compatibility mode is being used. A virtual machine could have been used to workaround this issue, but I wanted to fix the root cause.
First, I started to gather some information about the main game executable by using PEiD, which is a tool capable of detecting most common packers and compilers used in executable files.
It seems to be that the executable is compressed using the open source Ultimate Packer for Executables (UPX) tool which makes debugging nearly impossible. Fortunately, the tool is capable of unpacking executables as well.
PS X:\Logical_Stones> upx -d LgStones.exe
Ultimate Packer for eXecutables
Copyright (C) 1996 - 2018
UPX 3.95w Markus Oberhumer, Laszlo Molnar & John Reiser Aug 26th 2018
File size Ratio Format Name
-------------------- ------ ----------- -----------
315904 <- 147968 46.84% win32/pe LgStones.exe
Unpacked 1 file.
I started debugging the unpacked LgStones.exe with IDA Debugger. The execution immediately stopped with a common symptom of a heap corruption:
The exception happened at the end of the function located at 0x407714
while the variable v7
was being deallocated. Can you spot the mistake in the following pseudocode?
{
[...]
v7 = (char *)malloc(v6);
sub_403AC0(v4, v7);
for ( i = 0; i < a3; ++i )
{
sscanf(v7, "%d", &v11);
for ( ; *v7 != 32; ++v7 )
;
++v7;
if ( v11 > 0 )
{
glGenTextures(1, &v10);
v9 = v10;
*(_DWORD *)(a2 + 4 * i) = v10;
if ( sub_401AB8(&v12, v7, v9, 0, 0) != 1 )
{
free(v7);
return 0;
}
v7 += v11;
}
}
free(v4);
free(v7);
return 1;
}
The behavior is undefined if the value of ptr does not equal a value returned earlier by malloc(), calloc() or realloc().
As you can see the variable v7
is being modified in the body of the loop which causes undefined behavior if it is not pointing to the beginning of the allocated memory block by the time the execution reaches the corresponding free
statement.
The trivial solution would have been to replace the free
call with NOP instructions and just forget about the memory leak, but there was a reason I avoided using virtual machines in the first place.
What if we could create a custom implementation of malloc
and free
which is aware of this kind of misuse?
Let us create an extension which can be loaded upon startup. The purpose of this dynamic library is to create proxy functions for malloc
and free
which can handle the mistake of the developers. The library should also redirect the original calls to malloc
and free
automatically.
Caution: The following code snippet exploits the circumstances of this very specific scenario mentioned above and is by no means a generic solution.
void* block = nullptr;
void* on_misused_malloc(size_t size) {
return block = malloc(size);
}
void on_misused_free(void* /*faulty_block*/) {
free(block);
}
Since the game only allocates and deallocates the variable v7
once, the easiest solution is to store a pointer to the beginning of the allocated memory block and call free
on this pointer instead of the one provided by the game thus preventing the undefined behavior.
The only remaining task is to redirect the original calls to the proxy functions by overwriting the memory address of the CALL instructions in question.
The following instructions need to be changed - their operands should point to the proxy functions defined in our DLL.
Address Code Instruction
-------- ----------- -------------------------
0040778F E8 3C3C0100 CALL <JMP.&msvcrt.malloc> // v7 = (char *)malloc(v6);
00407769 E8 523C0100 CALL <JMP.&msvcrt.free> // free(v7);
0040782B E8 903B0100 CALL <JMP.&msvcrt.free> // free(v7);
Inside the DLL’s entry point the above-mentioned instructions are dynamically modified:
void redirect_call_instruction(intptr_t instruction_address, intptr_t proxy_address) {
LPVOID operand_address = reinterpret_cast<LPVOID>(instruction_address + sizeof(uint8_t));
DWORD old_protect;
VirtualProtect(operand_address, sizeof(intptr_t), PAGE_EXECUTE_READWRITE, &old_protect);
intptr_t relative_offset = proxy_address - instruction_address - 5;
memcpy(operand_address, &relative_offset, sizeof(LPVOID));
VirtualProtect(operand_address, sizeof(intptr_t), old_protect, nullptr);
FlushInstructionCache(GetCurrentProcess(), operand_address, sizeof(intptr_t));
}
BOOL WINAPI DllMain(HINSTANCE hinstDLL, DWORD fdwReason, LPVOID lpReserved) {
if (fdwReason == DLL_PROCESS_ATTACH) {
redirect_call_instruction(0x0040778F, reinterpret_cast<intptr_t>(on_misused_malloc));
redirect_call_instruction(0x00407769, reinterpret_cast<intptr_t>(on_misused_free));
redirect_call_instruction(0x0040782B, reinterpret_cast<intptr_t>(on_misused_free));
}
return TRUE;
}
The relative addresses of the faulty malloc
and free
calls are overridden by the relative addresses of our proxy functions. Explaining the whole concept is beyond the scope of this article, but if you would like to learn more about x86 hooking in general, I would recommend the following article: http://jbremer.org/x86-api-hooking-demystified/
The final step is to associate our DLL somehow with the main game executable. Since the faulty free
is called right after launching the game, traditional run-time DLL injection methods would not be sufficient. By using petools I added the LgStonesAllocator.dll to LgStones.exe’s import table which loads the library automatically when it is executed.
The game successfully starts without a crash, but there seems to be another problem - its user interface supports only the 4:3 aspect ratio and is completely unusable at today’s common resolutions. The window of the game becomes full screen by default and it enforces the current resolution of your display.
In the next article, I am expanding the game with configurable resolution handling.
You may download and play the game, including all the fixes for free.
The source code for LgStonesAllocator
is also available.